Wednesday, January 26, 2011

The Needle Knot

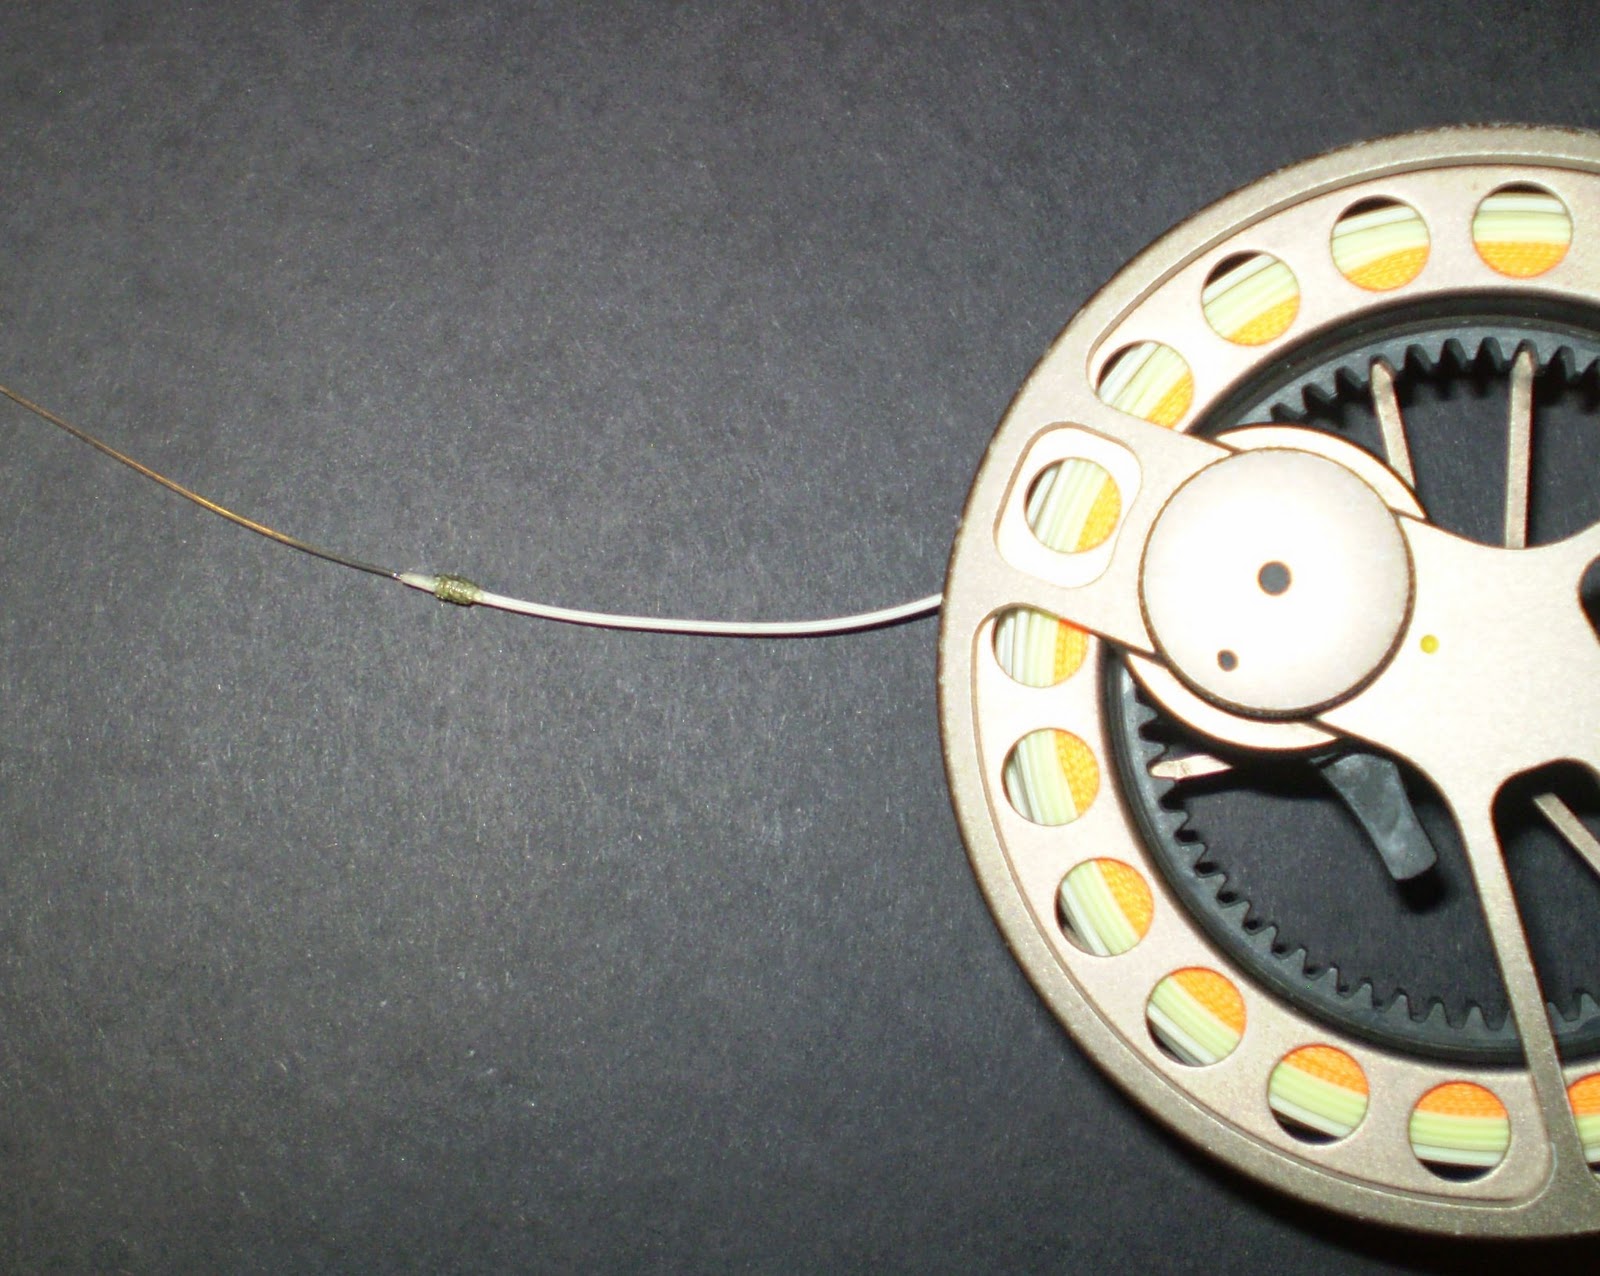
Now that we have the backing on the reel utilizing an Arbor Knot and the fly line attached to the backing utilizing a Nail Knot, Let’s attach the tapered leader to the fly line with a Needle Knot.


The Nail Knot was good practice for learning how to tie the more difficult Nail Knot. The Needle Knot is tied the same way as the Nail Knot except the leader is threaded through the fly line.

To begin with, take a needle and stick it into the middle of the end of the fly line. Push it in ¼ to ½ inch and force it through the side of the fly line.

Pull out the needle. Take the leader and place the tippet end into the hole on the side of the fly line that you just prepared. Thread the leader through the hole and out the end of the fly line.

 Pull all but the last 9 inches of the leader through. This last nine inches is what you will use to tie the needle knot around the fly line just above where the leader comes out of the hole in the side of the fly line.

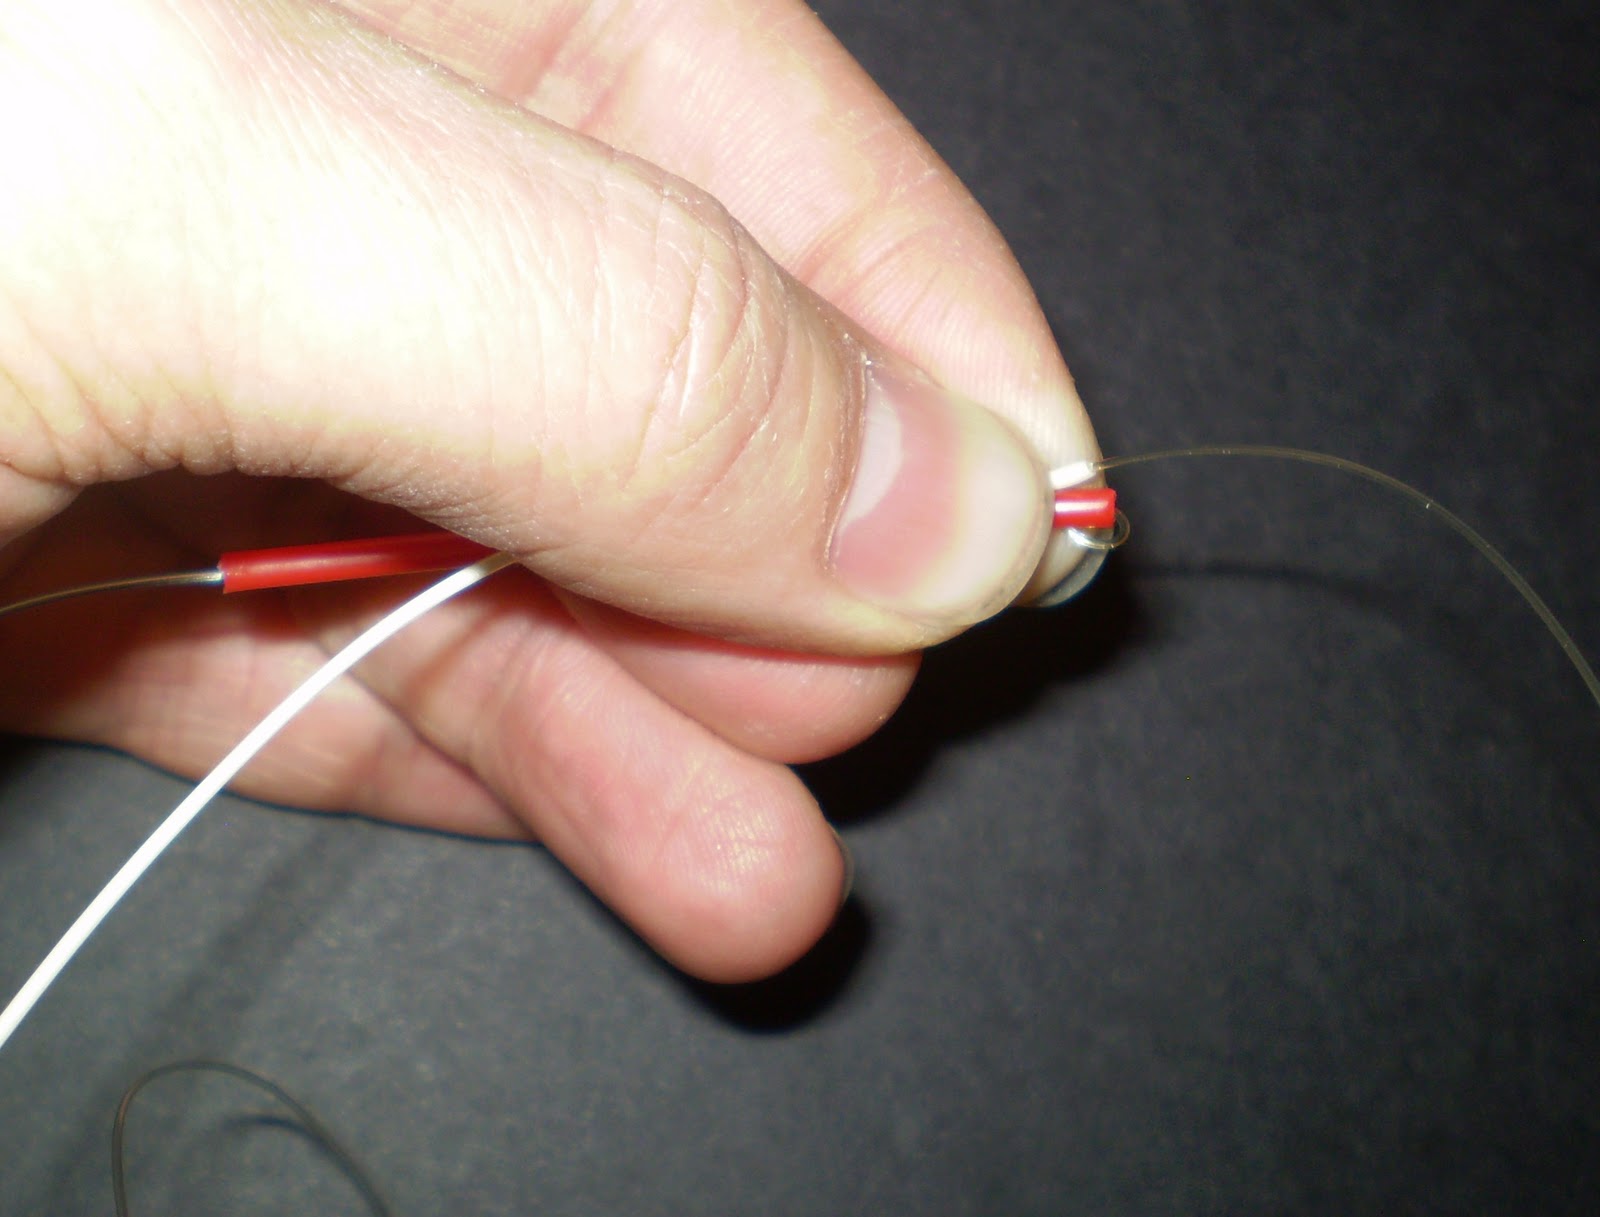
Procure a small tube. The one you used for the Nail Knot will work just find. In fact, you may want to keep this small tube around for tying future knots. Place the tube alongside the leader and fly line.

About ¾ an inch above the hole, start wrapping the leader back on itself and around the fly line toward the hole.

After 6 or 7 wraps, maintain pressure on the wraps with one hand and thread the leader through the tube.

Pull the tube out. Carefully tighten the knot trying to keep the wraps from overlapping one another.

You want this knot to be as slim and smooth as possible so it will easily slip through the guides.

Trim the tag end as close as possible.

If you want, you can apply fly tying head cement to the knot. If you do, make sure you place some glue over the holes you made with the needle, one at the very end of the line and one at the start of the knot. This will help keep the water from wicking into the line making it more difficult to stay afloat.

Thursday, January 13, 2011

Fly Rod Repair

It has sure been a cold and wet couple of months. Sorry my stories have been few and far between. Last winter I fished through most of December and I remember fishing the first week of the year, even on New Years Day. Not this year. It has been rare to even see the temperature above freezing. I have tried to put some of this time to good use. What a better time than now to do some rod building.


One project I completed was repairing a broken fly rod. Last year on the last day of fishing the Green River the wind blew a car door closed on my Sage RPL. This was a rod I built twenty years ago. This was my workhorse rod that I used on every trip. It has caught well over a thousand fish.

I took the broken rod into Fish Tech to send back to the manufacturer. It is under a lifetime warranty, so with a shipping and handling fee, Sage sent me back a new blank for the butt section that broke.


I then purchased the needed hardware: Reel Seat, Cork Handle, Winding Check, Hook Keeper, Stripping Guide and Snake Guide. The guides at Fish Tech helped me ream the inside of the handle to the proper size before I even left the store. I wrapped a couple of bushings of masking tape on the end of the blank to make the Reel Seat fit properly.

I ordered some epoxy from Hook & Hackle since I didn’t have any left over from the last time I built a rod. When it arrived I used it to glue the Reel Seat, Handle, and Winding Check in place.


After this was dry, I wrapped on the guides and Hook Keep, using the same spacing I had used on the original rod.  I did have left over Rod Wrap Epoxy for the finish.

When I built my last two rods I had made an electric rod turner out of an old alarm clock. It works perfect.

I coated the wraps with the epoxy and let it dry on the rotator overnight.

I did make a couple of improvements while rebuilding this rod. The Cork Handle is made from the highest grade of cork I could find. The titanium/coralwood reel seat is from American Tackle and is quite unique. Anyway, I love how the rod turned out.