Wednesday, February 9, 2011

Building A Fly Rod – The Steps: Day One

A lot of the manufacturer’s expense in manufacturing a fly rod is the labor it takes to wrap the guides onto the rod. You can save a lot of money on a high quality rod by doing this yourself. The starting point is deciding which rod you want to build and then purchasing a blank. The blank is typically half the price of a finished rod.


The Spine

Once you have the rod blank you need to find the spine on each piece. This is usually provided by the manufacturer now days. When I built my first few fly rods 20 to 25 years ago this wasn’t the case. You would always need to determine this yourself. On the Sage blank I’m currently building, the manufacturer put white dots on the spine. This lets you know how to align the guides and reel seat on the blank.

If you do have to do this yourself, I will explain. Start with one piece of the blank. Place one end against a smooth surface and the other end on your open palm. Gently bend the blank. Rotate the curved blank back and forth. At one point you will notice the blank will pop or jump into a natural curve that is hard to roll out of. This point in the rotation indicates the spine. I usually wrap a piece of masking tape around the blank and mark this point on the tape with a pencil. The guides will be aligned along the inside curve of the spine (for a fly or spinning rod). If you were building a casting rod you would place the guides on the outside curve of the spine. Find the spine for each piece of the blank.


The Cork Handle

The inside diameter of the preshaped cork handle will need to be reamed to fit the blank. To do this I use a rat tail file and start reaming out the middle of the handle. There are also rod building reaming devices specifically made for this purpose that can be purchased.

The important thing to remember as you file is to keep rotating the handle so the hole stays perfectly centered. You want the handle to snugly fit on the blank so don’t overdo it. This process will create a lot of dust so don’t do it in the same room where you will be doing the wrapping and finishing.


The Reel Seat

The inside diameter of the reel seat will always be larger than the outside diameter of the rod blank. To compensate for this you will need to build up the blank to fit the reel seat so the reel seat will be centered. This is done by creating shims or arbors by wrapping masking tape around the blank in the amount that will fit the reel seat. Leave about 1/8 to ¼ inch between the ½ inch to ¾ inch wide arbors. This will allow the epoxy to cover all the surfaces between the blank and reel seat and provide proper gluing.


The Epoxy

After the blank is prepared for the reel seat and the cork handle fits the blank properly, you are ready to prepare the epoxy. The epoxy comes in two parts, the resin and the hardener. You will need to mix equal amounts of each in at least the quantity needed for the gluing of the reel seat and handle to the rod. First, warm epoxy part A (The Resin) and epoxy part B (The Hardener) in some warm water. This will make it easier to work with, easier to measure, will help expel bubbles formed from mixing and also give you a little more working time. It is important to mix equal amounts and to mix adequately. If these two important items are not done properly, the epoxy will not dry hard and will remain tacky (sticky). One way to mix this is the following. On a plastic lid, place an equal amount of each epoxy component next to each other in the approximate amount that you will need, or a little bit more. Mix the two circles of epoxy components together with a wooden stick, plastic spoon or knife, or something similar. Mix for at least two minutes making sure all of it is mixed in together.

Coat the tape arbors completely with the mixed epoxy and then the blank between the arbors. Place the reel seat onto the bushings, twisting the reel seat as you slide it on to make sure it also gets completely covered inside with epoxy. The dried epoxy will then provide the support for the real seat, not the tape. Align the reel seat with the spine. Double check that the reel seat is aligned with the spine.

Mark the blank for the top of the handle so you will know how far to coat the blank with epoxy. Coat the blank with epoxy from the reel seat to the just below the mark. Place the handle onto the blank twisting as you reach the epoxy ensuring the epoxy is covering everything it needs to. Align the handle with the reel seat, which is in turn aligned properly with the spine. I usually glue the reel seat, the handle and the winding check to the blank in one step since I already have epoxy prepared.

Winding Check

The winding check is a small ring to cover the rough connection between the handle and the blank. It is usually made of metal, rubber or plastic and is sized to fit the diameter of the rod right at the top of the handle.

Place a little epoxy next to the top of the cork handle. Slide on the winding check and butt it up right next to the top of the handle on the epoxy.

When you are satisfied everything is properly in place and aligned (double check), you can allow this section of the rod to dry over night.

Monday, February 7, 2011

Building A Fly Rod

During this long winter I also completed another project, building a new fly rod. It has been 20 years since I’ve built a new fly rod. However, in these twenty years I have rebuilt two tip sections and one butt section. I’m thankful for lifetime warrantees.

My wife asked me what I wanted this year for my birthday and I responded that I would like a new fly rod blank for building a new fly rod. I started doing research on the latest and greatest fly rods on the market. The last two rods I built and fished with these past twenty years were Sage rods (5wt 9 1/2 ft RPL and a 4wt 9 ft LL) which I really liked so I started with that brand. Sage Z-axis rods seem to have the best reviews and are well liked by everyone, including the guides at the fly shops. Doing some price comparisons I found a seller on eBay (Angler’s Habitat) that offered the same price for the blank as everywhere else but also included all other components for building the rod for free. I went with this – Happy Birthday!

One thing I have noticed with the newer rods/blanks is that they are quite a bit lighter. Another thing is that 4 piece rods are a lot more common. This is due to the fact that ferrules have improved drastically from twenty years ago. Another improvement is that the manufacturer marks the spine location for you. This is to help you know how to align the guides so you don’t have to figure it out yourself.

The hardware components for building a fly rod include: Reel Seat, Cork Handle, Winding Check, Hook Keep, Stripping Guide, Snake Guides and the Tip Top Guide.

Other items that are needed are: Epoxy for gluing the reel seat and cork handle to the blank, Flexible Epoxy for the finish on the thread wraps, Rod Wrapping Thread and Masking Tape.

Tuesday, February 1, 2011

An Arbor Knot Trick

This week I was putting some cool orange backing onto one of my reels. After tying the arbor knot I was a little frustrated that the backing wouldn’t just wind onto the reel as I wound the handle.

I had to hold the backing against the arbor until it had made a couple of wraps around itself so it wouldn’t keep slipping. I tried the knot again, but this time I wrapped the backing around the arbor twice before tying the knot. This did the trick. I was able to wind the reel and the backing did not slip.

Wednesday, January 26, 2011

The Needle Knot

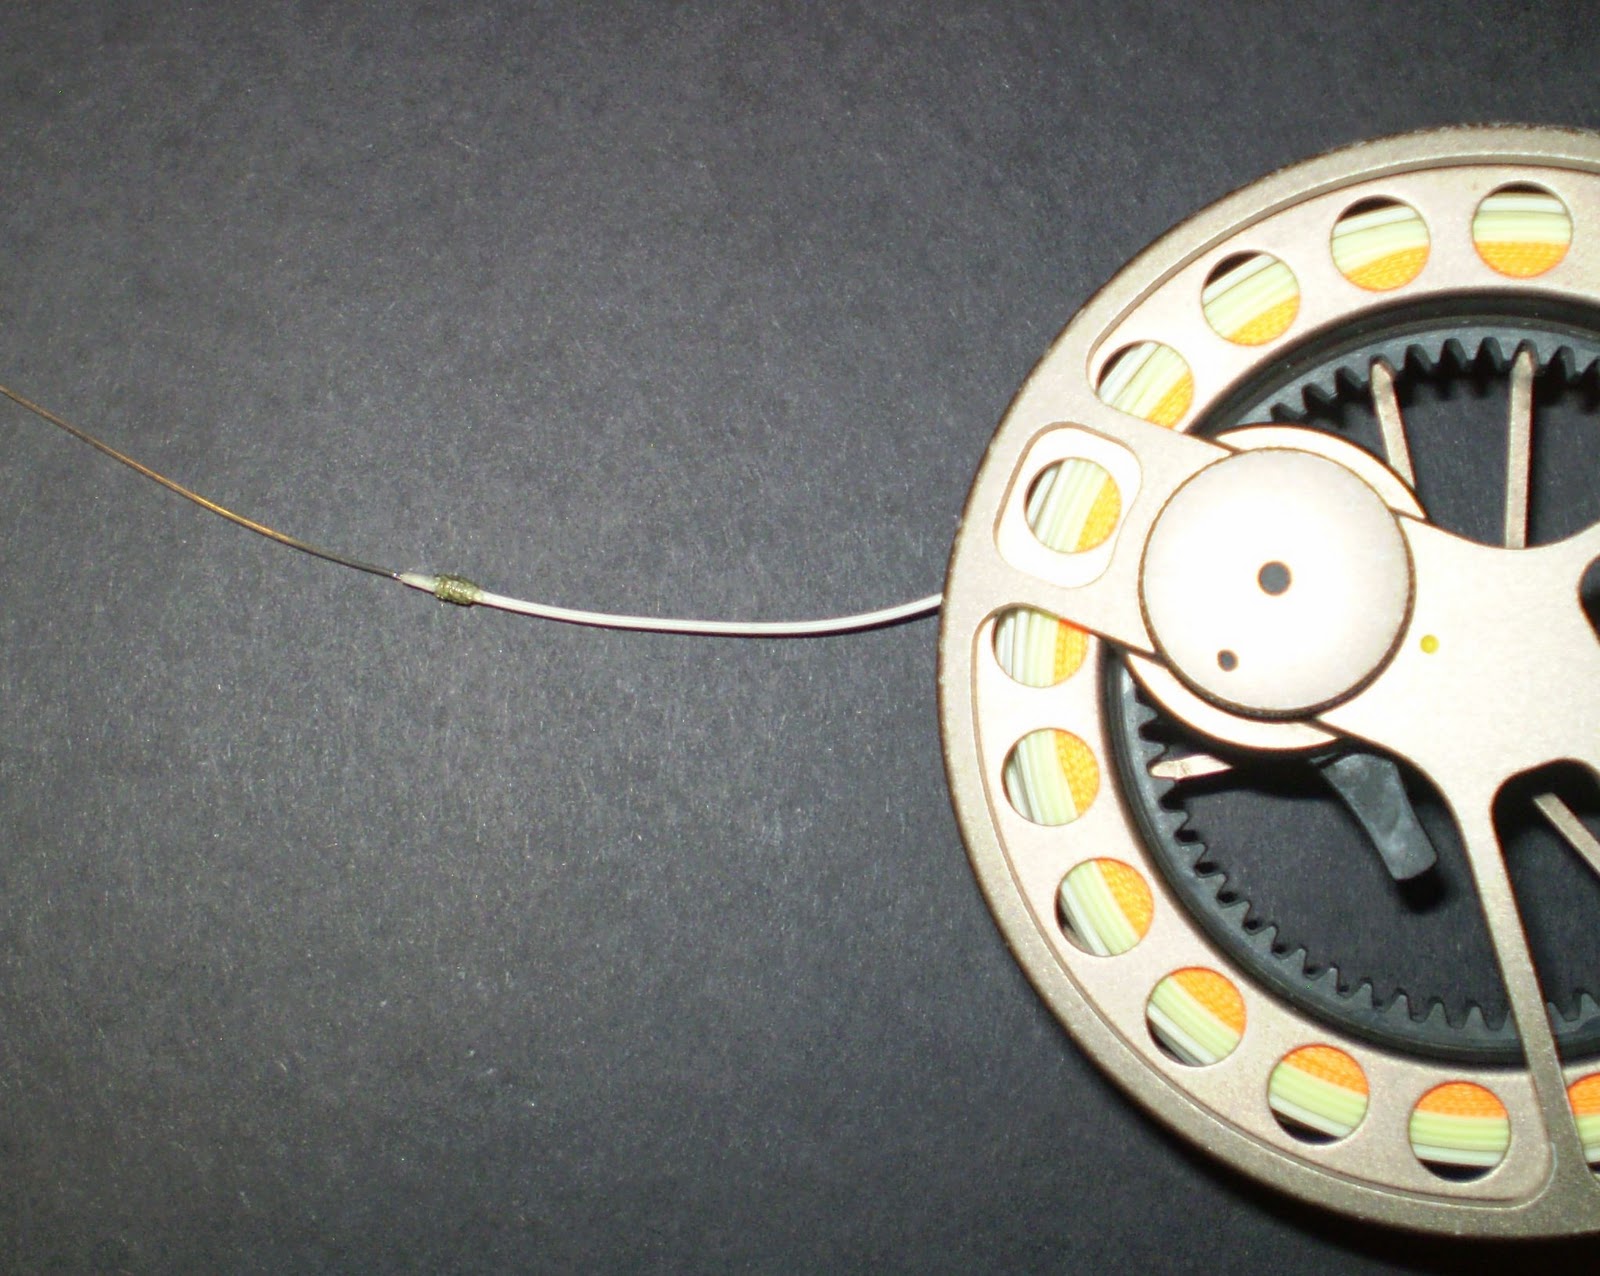
Now that we have the backing on the reel utilizing an Arbor Knot and the fly line attached to the backing utilizing a Nail Knot, Let’s attach the tapered leader to the fly line with a Needle Knot.


The Nail Knot was good practice for learning how to tie the more difficult Nail Knot. The Needle Knot is tied the same way as the Nail Knot except the leader is threaded through the fly line.

To begin with, take a needle and stick it into the middle of the end of the fly line. Push it in ¼ to ½ inch and force it through the side of the fly line.

Pull out the needle. Take the leader and place the tippet end into the hole on the side of the fly line that you just prepared. Thread the leader through the hole and out the end of the fly line.

 Pull all but the last 9 inches of the leader through. This last nine inches is what you will use to tie the needle knot around the fly line just above where the leader comes out of the hole in the side of the fly line.

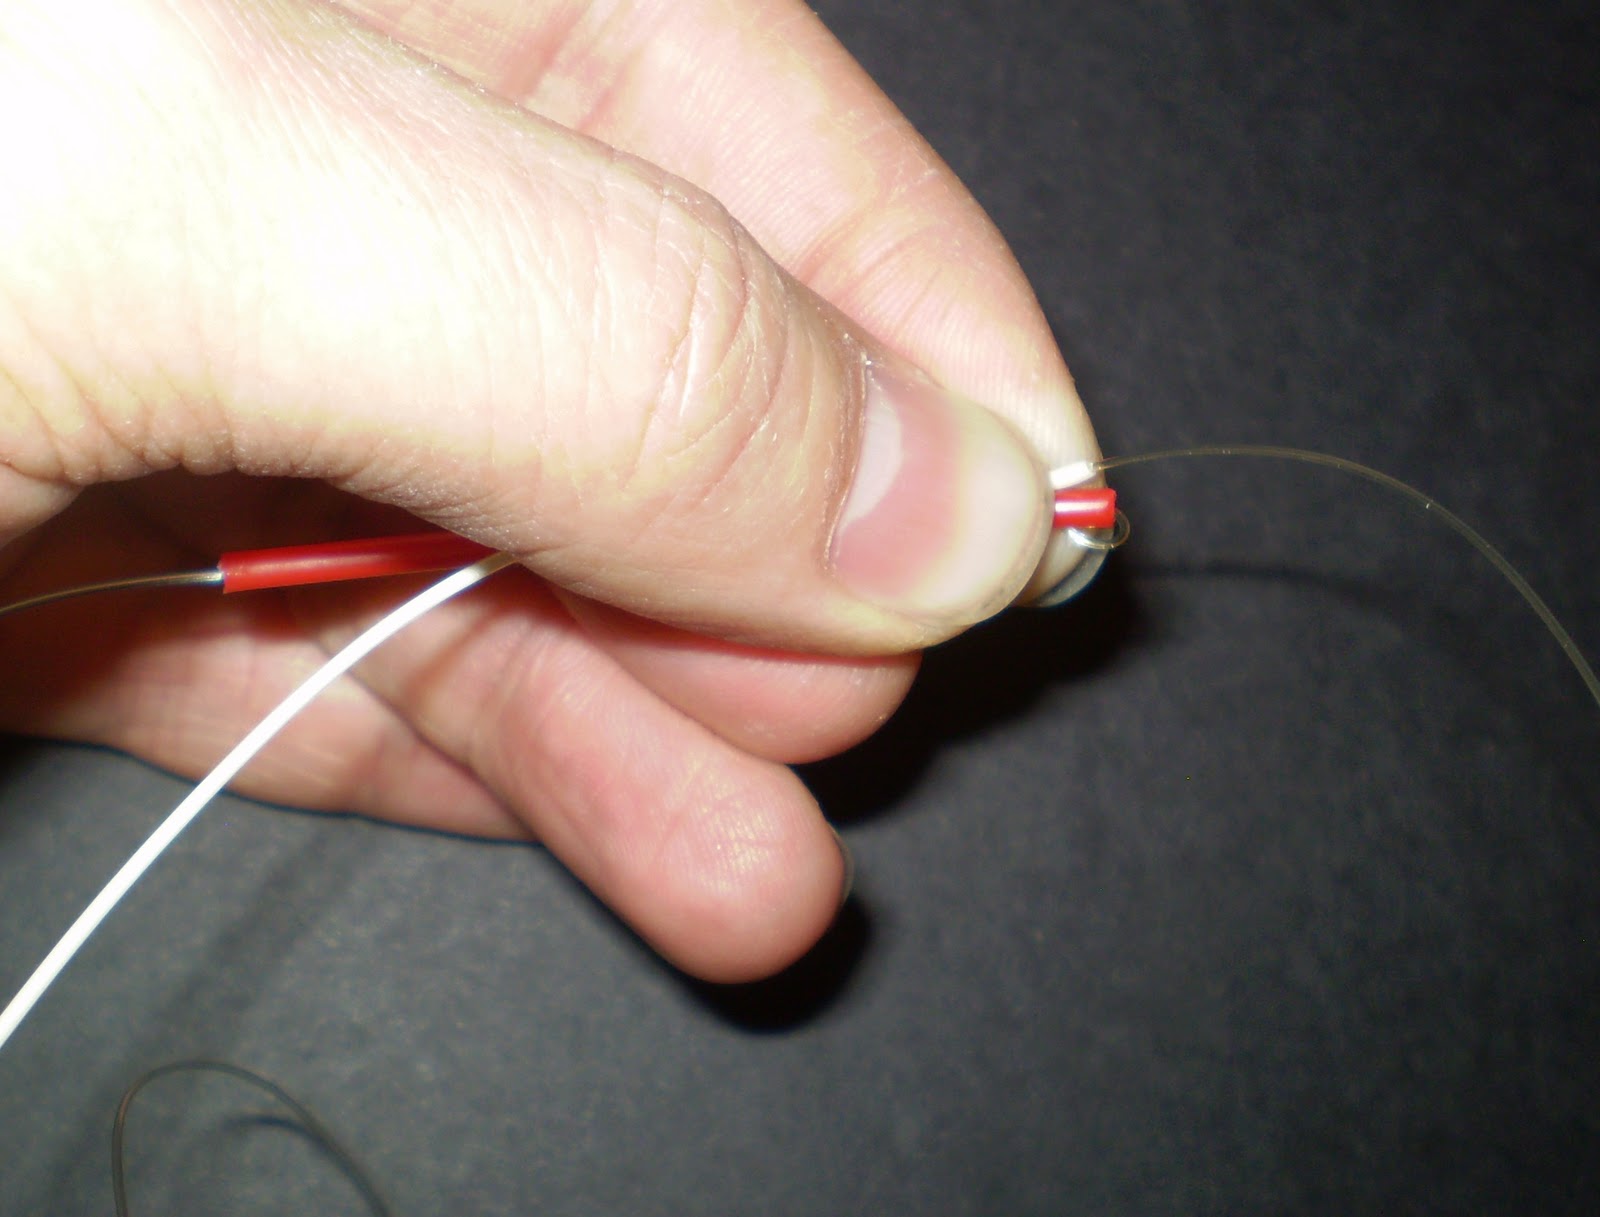
Procure a small tube. The one you used for the Nail Knot will work just find. In fact, you may want to keep this small tube around for tying future knots. Place the tube alongside the leader and fly line.

About ¾ an inch above the hole, start wrapping the leader back on itself and around the fly line toward the hole.

After 6 or 7 wraps, maintain pressure on the wraps with one hand and thread the leader through the tube.

Pull the tube out. Carefully tighten the knot trying to keep the wraps from overlapping one another.

You want this knot to be as slim and smooth as possible so it will easily slip through the guides.

Trim the tag end as close as possible.

If you want, you can apply fly tying head cement to the knot. If you do, make sure you place some glue over the holes you made with the needle, one at the very end of the line and one at the start of the knot. This will help keep the water from wicking into the line making it more difficult to stay afloat.

Thursday, January 13, 2011

Fly Rod Repair

It has sure been a cold and wet couple of months. Sorry my stories have been few and far between. Last winter I fished through most of December and I remember fishing the first week of the year, even on New Years Day. Not this year. It has been rare to even see the temperature above freezing. I have tried to put some of this time to good use. What a better time than now to do some rod building.


One project I completed was repairing a broken fly rod. Last year on the last day of fishing the Green River the wind blew a car door closed on my Sage RPL. This was a rod I built twenty years ago. This was my workhorse rod that I used on every trip. It has caught well over a thousand fish.

I took the broken rod into Fish Tech to send back to the manufacturer. It is under a lifetime warranty, so with a shipping and handling fee, Sage sent me back a new blank for the butt section that broke.


I then purchased the needed hardware: Reel Seat, Cork Handle, Winding Check, Hook Keeper, Stripping Guide and Snake Guide. The guides at Fish Tech helped me ream the inside of the handle to the proper size before I even left the store. I wrapped a couple of bushings of masking tape on the end of the blank to make the Reel Seat fit properly.

I ordered some epoxy from Hook & Hackle since I didn’t have any left over from the last time I built a rod. When it arrived I used it to glue the Reel Seat, Handle, and Winding Check in place.


After this was dry, I wrapped on the guides and Hook Keep, using the same spacing I had used on the original rod.  I did have left over Rod Wrap Epoxy for the finish.

When I built my last two rods I had made an electric rod turner out of an old alarm clock. It works perfect.

I coated the wraps with the epoxy and let it dry on the rotator overnight.

I did make a couple of improvements while rebuilding this rod. The Cork Handle is made from the highest grade of cork I could find. The titanium/coralwood reel seat is from American Tackle and is quite unique. Anyway, I love how the rod turned out.


Wednesday, December 15, 2010

Stretching Exercises

Last year I went over some cardio and back exercises with you. I noticed after months of cardio exercises on the elliptical and treadmill that my knees were starting to hurt. They wouldn’t hurt while I worked out, but a couple of hours later. I talked to the personal trainer at my work and she gave me some stretching exercises to do. My knees have not hurt at all since I’ve started doing these. I do them after every cardio workout at the same time I do the back exercises.


IT Band Stretch with IT Band Foam Roller

The IT doesn’t stand for Information Technology, it stands for Iliotibial, the muscle on the side of your upper leg. How you perform this exercise is to roll the foam roller along the side of your upper leg. To do this you place the roller on the floor perpendicular to how you will lay down. Lay down on your side over the roller so it is positioned just below the hip. With the help of your hands, roll on the roller from your hip down to your knee. Roll back and forth for about 10 seconds. Your top leg can be bent in front to relieve some of the pressure. Repeat on the other leg. Do this for three repetitions. This will be painful for the first few times but after awhile it won’t hurt much.


Figure 4 Glute Stretch

This is to stretch out your gluteus maximus. The exercise is performed by lying on your back with your knees bent, placing one of your ankles just above the other leg’s knee. This causes the form of an upside down figure 4. Wrap both hands around the outside leg and pull it towards your chest. You should feel your muscle stretch on the outside of your hip. Hold this position for about ten seconds. Repeat with the opposite leg. Do this for three repetitions.


Standing Quadriceps Stretch

This will obviously stretch your quadriceps (thighs and hips). It is performed by standing (you can hold onto something if necessary) and bending one leg backwards. Grab the top of the ankle or forefoot and pull toward your rear to the point of mild discomfort. Keep your hip straight and your knee in proper alignment, not off to the side. Hold for 10 seconds and repeat on the other leg. Do this for three repetitions.


Figure 4 Hamstring Stretch

Sit down on the floor with one leg stretched out straight. Place the bottom foot of the other leg against the knee of the straight leg creating a figure 4 shape. Bend your torso and reach toward the upright foot of your straight leg until you feel the stretch along the back of your thigh. Hold for 10 seconds and switch legs. Repeat three times.


Wednesday, December 1, 2010

The Nail Knot


The Nail knot is a useful knot for tying the backing onto the fly line.


It is tied by obtaining a small tube. One like you find on canned air works great. Place the tube alongside the end of the fly line. Place about six inches of the backing from your reel alongside these two.


Leaving about an inch still beside the tube and the end of the fly line, wrap the backing neatly and tightly around the tube and the fly line 5 to 7 times toward the reel.


Pass the backing through the tube.


While holding the wraps with one finger and thumb, pull the tube out.


While still holding the wraps, carefully pull the backing on each side of the knot to tighten. Let go of the loops and tighten again. After the knot is tight, pull on the fly line and backing to test the knot.


If the knot was successful go ahead and trim the ends.


You can put fly tying head cement on the knot to make it smoother so it will go through the guides more easily.


Note: you can also use a nail instead of the small tube by working the backing alongside the nail under the wraps.